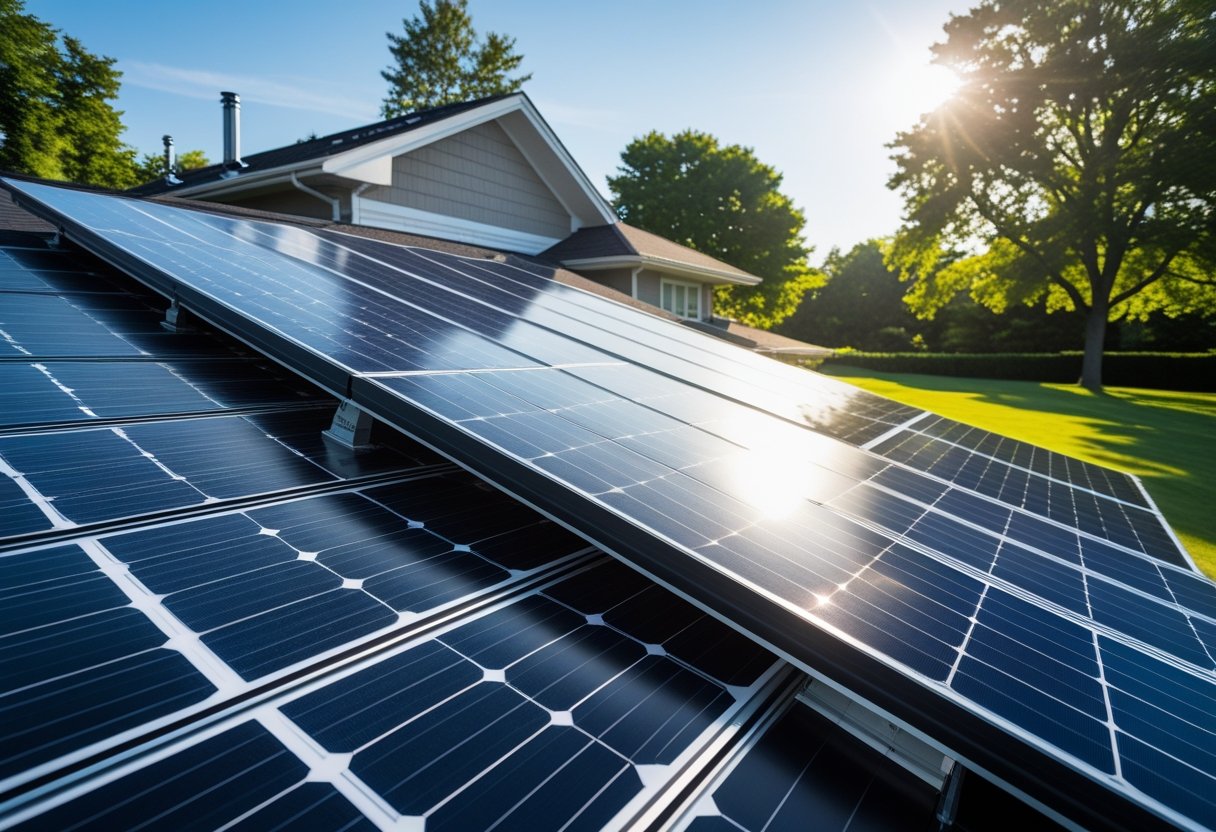
Getting your roof ready for solar panels means making sure it’s strong enough and properly set up to support them. The best way to prepare your roof is by checking its condition, ensuring proper ventilation, and choosing materials that work well with solar installations.
This makes adding solar panels easier and helps them last longer.
You’ll want a roofing expert to inspect your roof for damage or areas that might need fixing before the solar panels go up. Proper attic ventilation keeps heat and moisture from building up, which can wear down your roof faster.
Some roofing materials, like metal, reflect heat better and make solar panel installation smoother. If your roof isn’t ready, adding solar panels could lead to extra costs or repairs soon after installation.
Evaluating Your Roof’s Suitability
Before installing solar panels, check your roof’s age, type, and direction. These factors affect how well solar panels work and how long your roof lasts after installation.
Assessing Roof Age and Condition
Your roof should be in good shape before adding solar panels. If your roof is older than 15-20 years, consider replacing it first.
Solar panels last 25-30 years, so a new roof matches that lifespan. Look for signs of damage like missing shingles, leaks, or rotting wood.
If your roof needs repairs, fixing those first helps avoid extra costs later. A strong roof keeps the solar panel mounts secure, making your system safe and efficient.
Choosing the Best Roof Types for Solar Installation
Not all roofs work equally well with solar panels. Roofs made of asphalt shingles, metal, or tile are good options because they’re sturdy and easy to work on.
Asphalt shingles are the most common and usually the easiest for mounting solar panels. Avoid installing solar panels on roofs with rolled roofing or wood shakes, as they can be fragile or hard to work with.
Flat roofs can work but may need special mounting systems to tilt the panels for maximum sun exposure.
Determining Roof Orientation and Slope
Your roof’s direction and angle affect how much sunlight your panels get. In the Northern Hemisphere, a south-facing roof gets the most sun throughout the day.
The ideal roof pitch is between 15 and 40 degrees to capture the most sunlight. If your slope is too flat or too steep, solar panels might need angled mounts to improve their exposure.
You can use a compass or smartphone app to check your roof’s direction. If your roof doesn’t face south, east or west can still work but may lower your system’s efficiency.
Inspecting and Repairing the Roof
Before adding solar panels, your roof must be strong, leak-free, and well-ventilated. Check for structural damage, fix damaged materials, and make sure airflow and drainage are good.
Identifying and Fixing Structural Issues
Look closely at your roof’s frame and support beams. If you see sagging, cracks, or rotting wood, these are signs of structural problems.
Repair these issues before installing solar panels because the panels add extra weight. A professional can check if your roof can handle solar panels or if you need reinforcements.
Fixing weak spots might include replacing damaged wood or adding new supports. Addressing these problems early keeps your roof safe and holds your panels securely for years.
Repairing or Replacing Roofing Materials
Check all roofing materials like shingles, tiles, and underlayment. Look for cracks, missing pieces, or worn spots that could let water in.
Repair or replace damaged roofing materials before solar installation. If you have older roofing, consider replacing it first.
Panels last for 25 years or more, so starting with a solid roof prevents costly repairs later. Ask your contractor to use durable, weather-resistant materials for better protection against Austin’s heat and storms.
Ensuring Roof Ventilation and Drainage
Good ventilation stops heat buildup and moisture, which can damage your roof and lower solar panel efficiency. Make sure vents are clear and working properly.
Check that airflow isn’t blocked by insulation or debris. Proper drainage prevents water pooling that can cause leaks or rot.
Clean out gutters and downspouts to let rainwater flow freely. Fix dents or clogs that slow water from leaving your roof.
Cleaning and Preparing the Roof Surface
Before installing solar panels, your roof must be clean and clear of anything that could block sunlight or damage the panels. This means getting rid of debris and making sure the tiles or shingles are in good shape.
Removing Debris and Obstructions
Remove leaves, branches, and dirt from your roof surface. Use a broom or a leaf blower for easy cleanup.
Clear all gutters and downspouts so water can flow freely. Check for objects like old nails, trash, or bird nests.
These could interfere with panel mounts or cause damage over time. Removing them keeps your roof safe and ready for the installation.
Be gentle to avoid damaging the roof materials, especially if you have fragile tiles. If you see loose shingles or broken tiles, plan to repair them before moving forward.
Cleaning Roof Tiles or Shingles
Once debris is gone, clean the roof surface well. Use a mild detergent mixed with water and a soft brush or a low-pressure hose.
Avoid harsh chemicals and high-pressure washers, as they can harm your roofing material. Pay special attention to any moss, algae, or mold growth, especially on tile roofs.
Removing these will extend your roof’s life and improve solar panel efficiency. After cleaning, let the roof dry completely before the solar panels go on.
A dry surface helps the mounting hardware stick better and reduces the chance of slipping during installation.
Evaluating Shading and Sun Exposure
To get the most from your solar panels, check how much sunlight hits your roof every day. Spot anything that might block the sun or cause shadows on your roof.
Identifying Shading Sources
Look around your property and note any objects that could create shadows. Common shading sources include nearby trees, chimneys, antennas, and tall buildings close to your home.
You want to know where these shadows fall during different times of the day and seasons. Use a smartphone app or a solar pathfinder tool to map your roof’s sun exposure.
This helps you see how shading changes through the day. Even small shaded areas can reduce solar panel efficiency.
Make sure to check from sunrise to sunset for a clear view.
Trimming Trees and Vegetation
If trees or bushes cast shadows on your roof, trim them back. Cut branches so they don’t block the sun during peak sunlight hours, usually from 9 AM to 3 PM.
Be careful not to damage the tree, and consider hiring a professional if the branches are large or hard to reach. If trimming isn’t enough, you might want to remove some trees, but check local rules before you do.
Keeping your roof clear of shading helps your panels produce more energy.
Upgrading Roof Structures for Solar Panels
Before installing solar panels, make sure your roof can support the extra weight and stay protected from weather damage. You might need to strengthen the roof and improve its waterproofing.
These steps help your solar panels last longer and work safely.
Reinforcing Roof Support
Solar panels add weight to your roof, so check if the structure can hold this load. If your roof framing is weak or old, add extra support like beams or braces.
This prevents sagging or damage over time. A professional will inspect your roof’s strength by looking at rafters, trusses, and decking.
If needed, they will install stronger materials to safely carry the panels' weight. Reinforcing your roof also helps during bad weather, like heavy winds or storms.
Waterproofing and Weatherproofing Techniques
Adding solar panels means drilling into your roof, which can cause leaks if not done right. Contractors use special flashing and sealants around all the panel mounts and holes to keep your roof waterproof.
Use high-quality underlayment beneath your shingles for extra protection. This layer keeps water from getting under the roof and causing damage.
Some roofing pros use synthetic underlayment because it resists moisture better than older materials. Weatherproofing your roof keeps it dry and strong, even during rain, hail, or intense Texas heat.
Planning Electrical and Safety Requirements
Before installing solar panels, make sure your roof is ready for electrical work and safe access. Know where to reach the roof and work with licensed electricians.
These steps keep the project smooth and protect your home.
Locating Roof Access Points
You need clear and safe access to your roof for the solar panel installation. Find ladders, stairways, or other entry points that let workers reach the roof easily.
Check for any obstacles like tree branches or power lines nearby that could cause problems. Make sure the area around the access points is strong enough to support walking and carrying equipment.
If you don’t have a direct way up, plan to add one or get professional help to create a safe path. Mark these spots clearly to avoid confusion during installation.
Coordinating with Licensed Electricians
Your solar panels will connect to your home’s electrical system. Work with a licensed electrician for this part.
They handle wiring, any updates to your electrical panel, and make sure the system follows local codes. If the solar installation involves changing electrical lines, you will likely need an electrical permit.
Your electrician can help get this permit to keep everything legal and safe. Communicate your solar goals and timing clearly with them so your installation matches the plan.
Obtaining Permits and Scheduling Inspections
Before installing solar panels, get the right permits and arrange inspections. These steps make sure your installation follows local rules and stays safe for your home and family.
Understanding Local Solar Installation Codes
Your local building department sets specific rules for solar panel installations. These codes cover where panels can be placed, how they attach to your roof, and safety requirements.
Check with your city or county to find what permits you need. Most places require a building permit and sometimes an electrical permit since your solar system connects to your home’s power.
You might also need to meet energy efficiency standards or special requirements if you live in a historic neighborhood. Hire a contractor familiar with your area’s rules to help you submit proper paperwork and avoid delays.
Scheduling Roof and Electrical Inspections
Inspections happen at different times during your solar setup to confirm everything is done right. First, a roof inspection ensures your roof is strong enough for solar panels.
This step identifies any repairs needed before installation. Once panels and wiring are in place, electrical inspectors check the connections for safety.
After all inspections pass, your utility company might require a final review before allowing your system to connect to the grid. Scheduling these inspections early keeps your project moving smoothly.
Your installer or roofing company can often help arrange the appointments with the right officials.
Partnering with Professional Installers
Working with experienced professionals makes installing solar panels smoother and safer. Find the right contractor and get ready for installation day.
Selecting Certified Solar Contractors
Choose a contractor with the right certifications and experience. Look for installers who have proven training and licenses in solar panel work.
Certified contractors follow safety rules and use proper techniques. Ask for references and check reviews to confirm their track record.
Local experience is a plus—they understand your area’s climate and building codes. Clear Choice Roofing, for example, is an Owens Corning Platinum Preferred Contractor with over 1,400 happy customers.
They use high-quality materials and follow strong warranties. Hiring a trusted professional protects your roof and investment.
Preparing for the Day of Installation
Before installation day, clear your driveway and roof area for easy access. Remove obstacles like tools, decorations, or loose objects.
Tell your family about the work day, so they know what to expect. Make sure your roof is in good shape.
If needed, fix any damage or weak spots before the panels go on. A solid roof helps your solar system last longer.
Keep communication open with your installer. They will tell you about timing and what the crew needs from you.
Being prepared helps the work go quickly and without surprises.
Final Steps Before Solar Panel Installation
Before your solar panels go up, check that your roof is ready. First, inspect your roof for damage like missing shingles or hail dents.
Fix these issues now to prevent bigger problems later. Next, clear the roof of debris like leaves, branches, or dirt.
A clean surface helps the installation team work smoothly and keeps your panels secure. Check with your roofing contractor to confirm your roof can support the panels.
Some roofs might need extra reinforcement or repairs before installation. Make sure all necessary permits and paperwork are in order.
Having approvals ready will avoid delays when the solar team arrives. Communicate with your solar installer about your roof type and condition.
Sharing details helps them plan the best way to attach the panels safely.
Checklist for Final Prep:
StepAction Roof conditionRepair damage, check for leaksClean surfaceRemove debris and dirtStructural supportConfirm roof can hold panel weightPermits and paperworkComplete and submit required documentsCoordination with installerShare roof details and schedule timing
Frequently Asked Questions
Preparing your roof for solar panels means knowing how they are installed and what works best on different roof types. Understanding these details helps you make smart choices.
What steps are involved in installing solar panels on my home roof?
First, an inspection checks your roof’s condition and structure. Next, the crew attaches the mounting system securely to the roof.
Then, they install the solar panels and connect them to your electrical system. Finally, they test the setup before it starts working.
Can solar panels be mounted on a roof without drilling, and how?
Yes, some systems use ballasted mounts that rest on the roof without drilling. These mounts use weight to hold panels in place, mostly on flat roofs.
This method avoids making holes but needs a sturdy, flat surface.
What should I consider when installing solar panels on a metal roof?
Metal roofs are strong and long-lasting and reflect heat well. Use special mounting brackets that attach to the raised seams without damaging the roof.
This keeps the roof watertight and makes installation easier.
How are solar panels securely attached to roof tiles?
Installers use mounts with hooks or brackets designed to fit under or around tiles. They carefully lift the tiles to place the mounts and then replace the tiles to avoid damage.
Sealants keep the roof watertight after mounting.
What are the best practices for mounting solar panels on a van roof?
Use lightweight, low-profile mounts to reduce wind resistance while driving. The mounts need strong adhesives or small bolts through reinforcement points.
Protect the van roof from leaks and avoid damage during installation.
If I have solar panels, what might cause my electric bill to remain high?
You might use more electricity than your panels produce. Shading on panels can also reduce their output.
Dirty panels can lower efficiency. Problems with the system’s wiring or inverter may affect performance.
Check your energy use and system health regularly to find these issues.